SP-167C
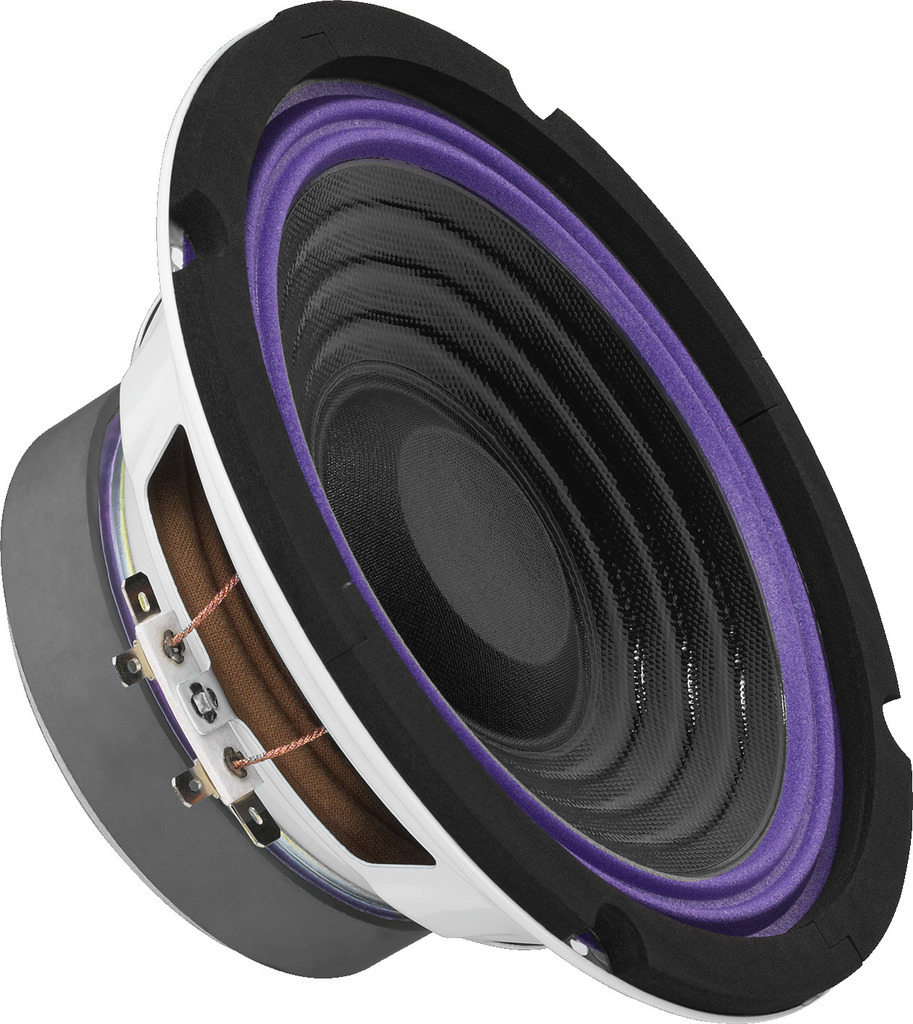
The loudspeaker chassis used by Flo for the subkick
The loudspeaker chassis used by Flo for the subkick
I am the drummer of Long Way Home and I have been playing with the guys for many years now. In the beginning, our style was something like California rock, similar to the sound of Blink 182, but by now it is more electro pop rock. It is a pretty unusual sound, but we like it.
Basically, subkick is just another word for a microphone that is able and supposed to pick up particularly low frequencies. You can use it for bass recordings or low tom-toms, however, it is mostly used for the kick drum. But it works for all low frequencies. In retail, you would have to pay between 200 and 300 euros to get something decent.
It was actually a spontaneous idea, rather born out of necessity. We were recording demos and wanted more deep bass really badly. So we have tried different microphones but we were still not satisfied. And the mics in the store were simply too expensive for me. And then I asked IMG STAGELINE if we could get a speaker, as part of the endorsement, with which I would be able to build something. IMG STAGELINE then sent us the SP-167C from MONACOR. That was my basis for getting started.
A speaker is just a reverse microphone. You have a cone, you have a magnet. Now, we need to think briefly about how a speaker works: the magnet causes the cone to vibrate by sucking it in and releasing it again through varying electromagnetic waves. This creates the sound, electromagnetic waves become sound waves and that is why the cone in a speaker billows in and out. The oscillation is caused by the varying attractive forces of the magnet. A microphone follows the same design, but in reverse: sound waves hit the diaphragm and become electromagnetic waves. These electromagnetic waves are then transmitted to an interface or a mixer.
At least you do not have to be an expert. Basically, you just reverse the polarity of the speaker: do not reproduce the frequency, but capture it, connect the cable the other way round. Subkick done. Again, the original condition is like this: the magnetic coil in the speaker chassis gets a sound signal, e.g. from a piece of music. The magnetic coil moves towards and away from the cone, causing it to vibrate. For the subkick, I simply send the sound to the cone first, which sends the sound via the contacts to the electromagnet and to the mixer. In practice, it really looks as if I were playing into a speaker. In the same way, however, a sound would also be produced if you just blew against the cone. It is a reverse speaker, thus a microphone (laughs).
I used a simple XLR male jack. You could also just drill a hole and solder the cable directly to the speaker. Solder pin 1 and pin 3 to the left contact of the speaker and pin 2 to the right contact.
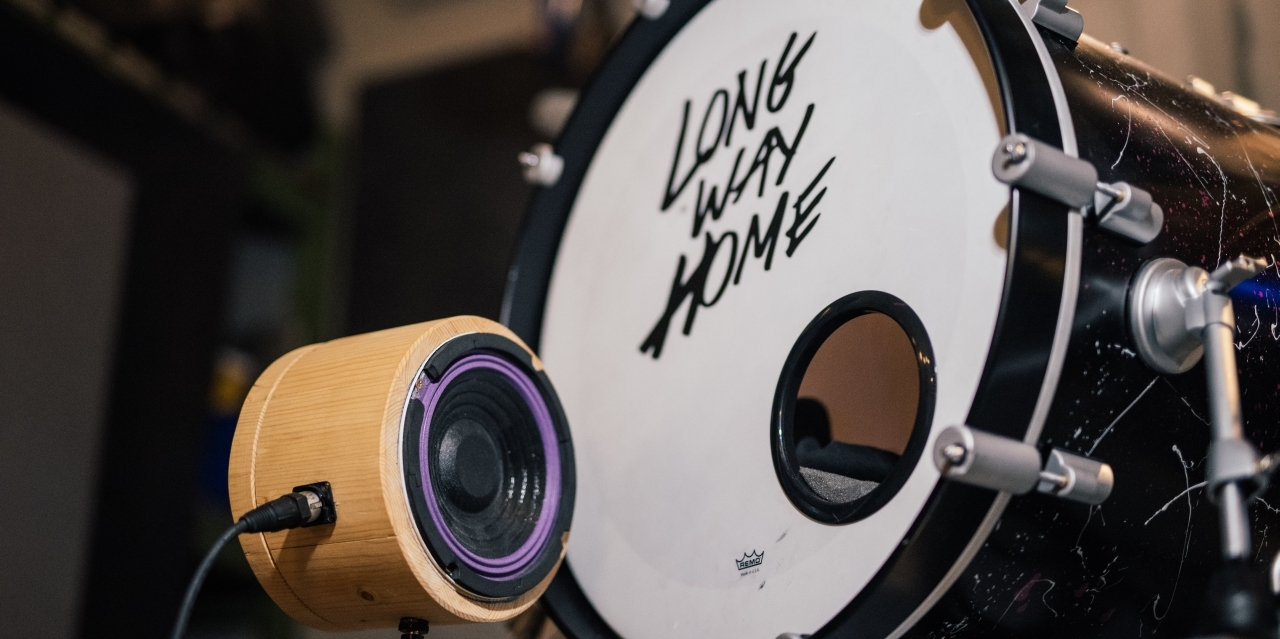
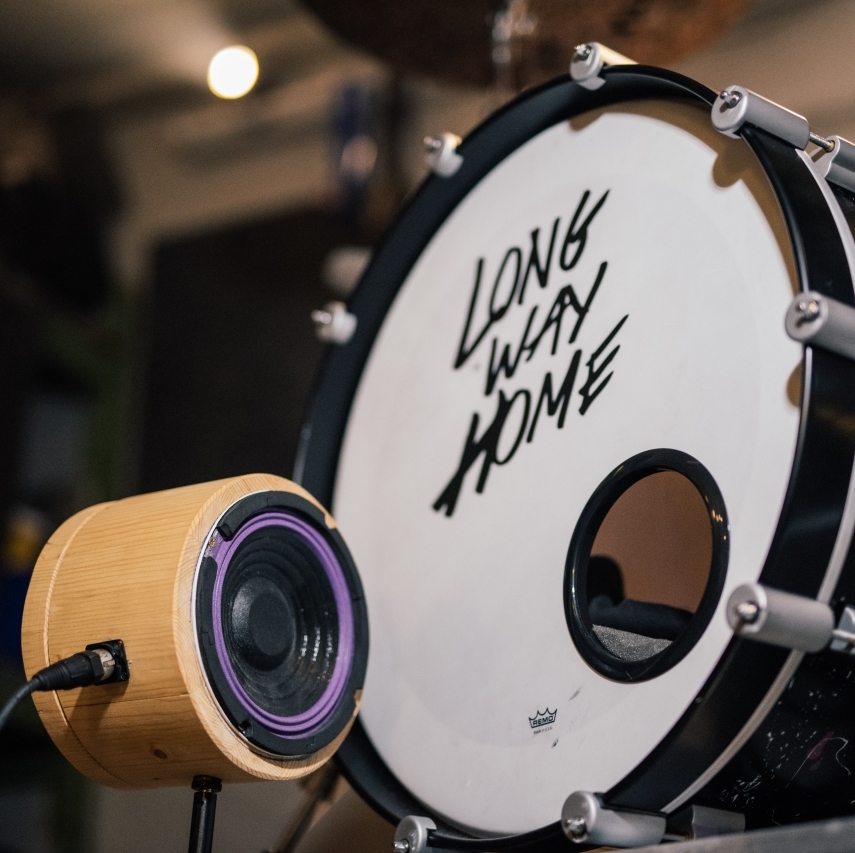
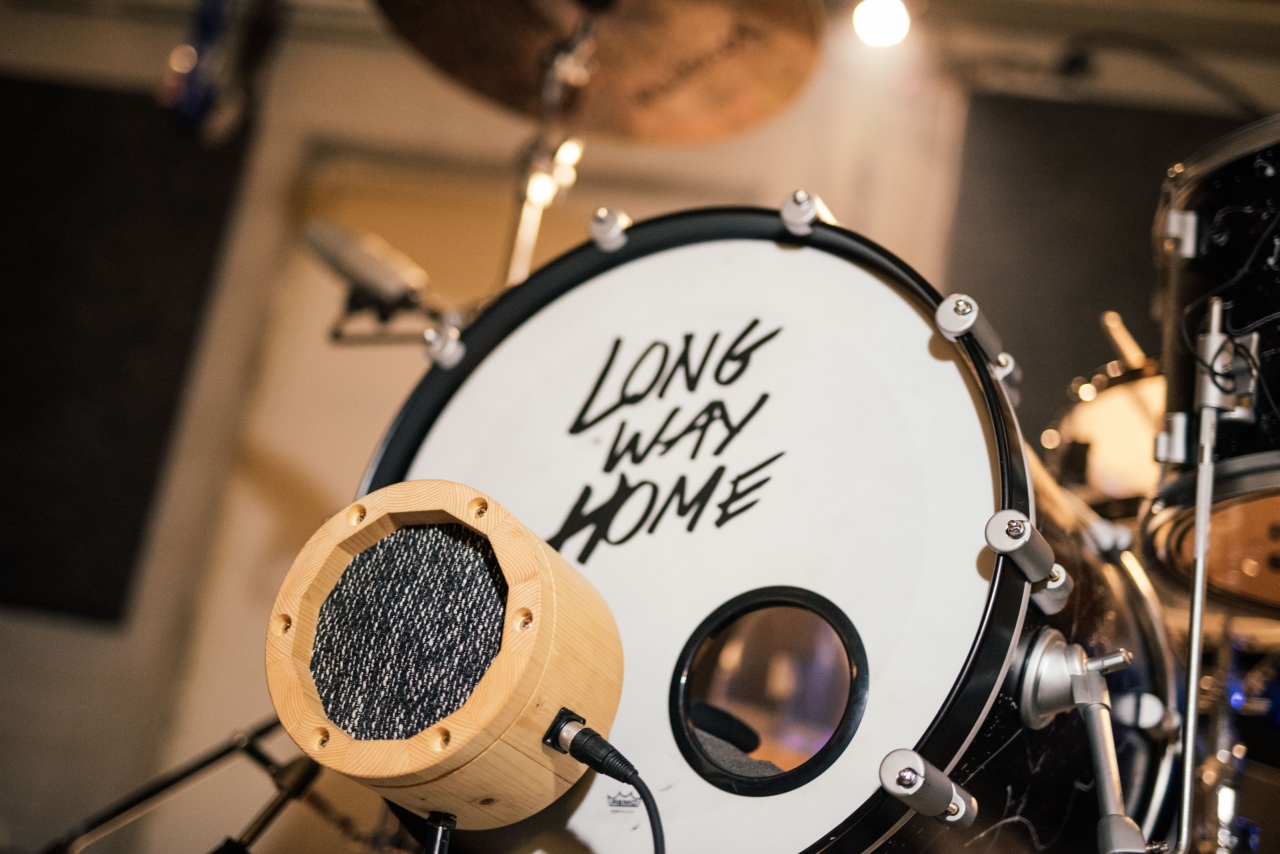
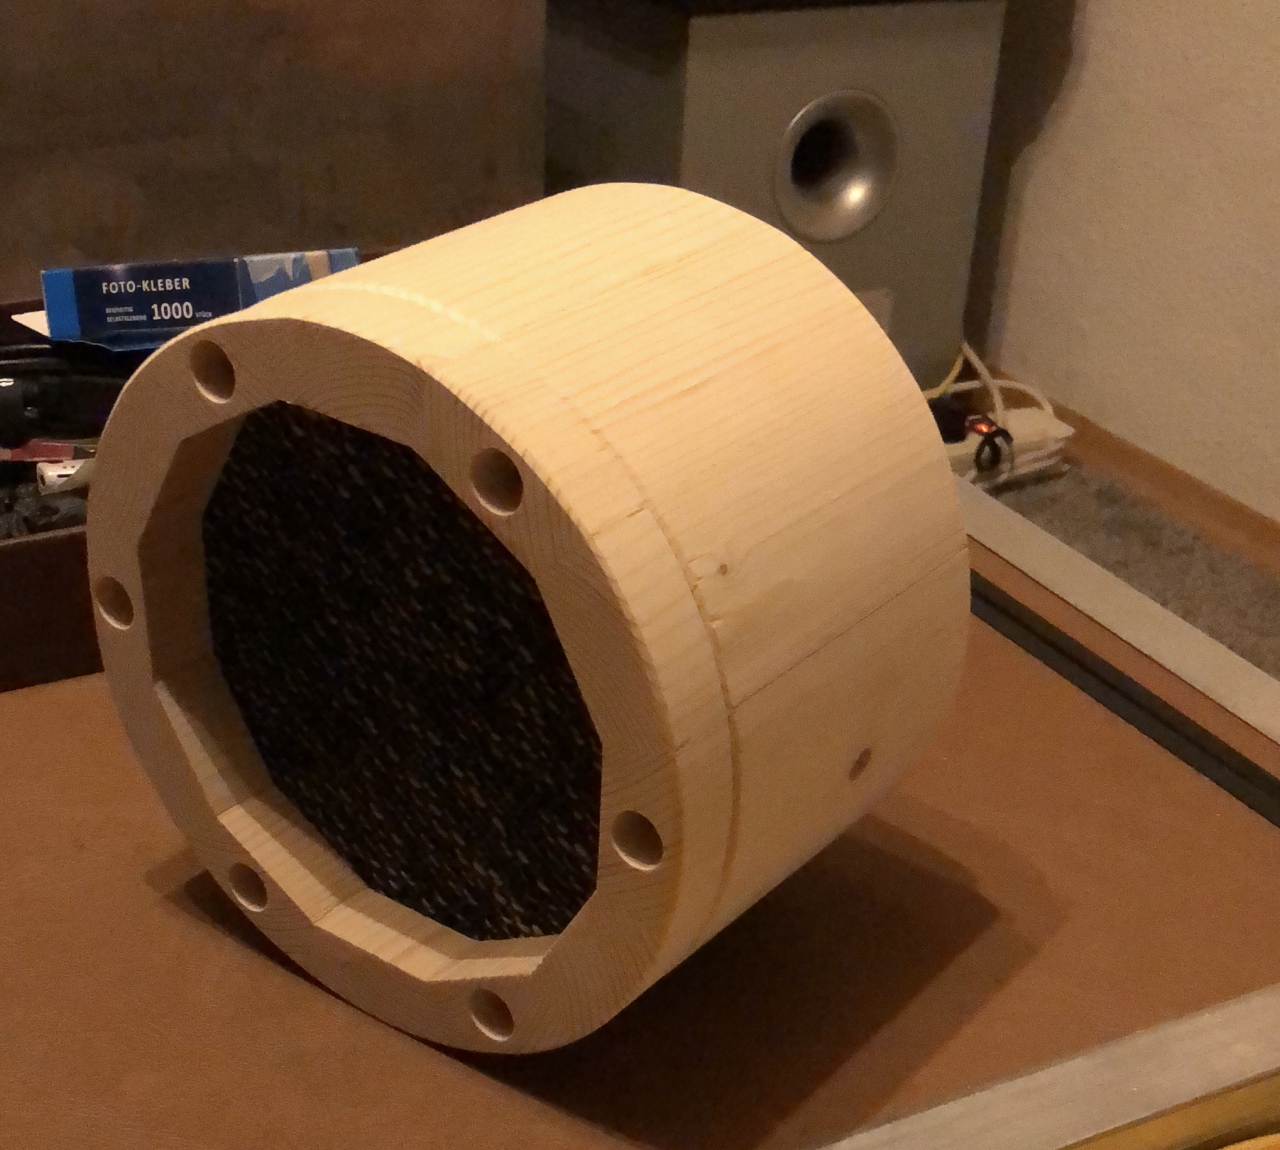
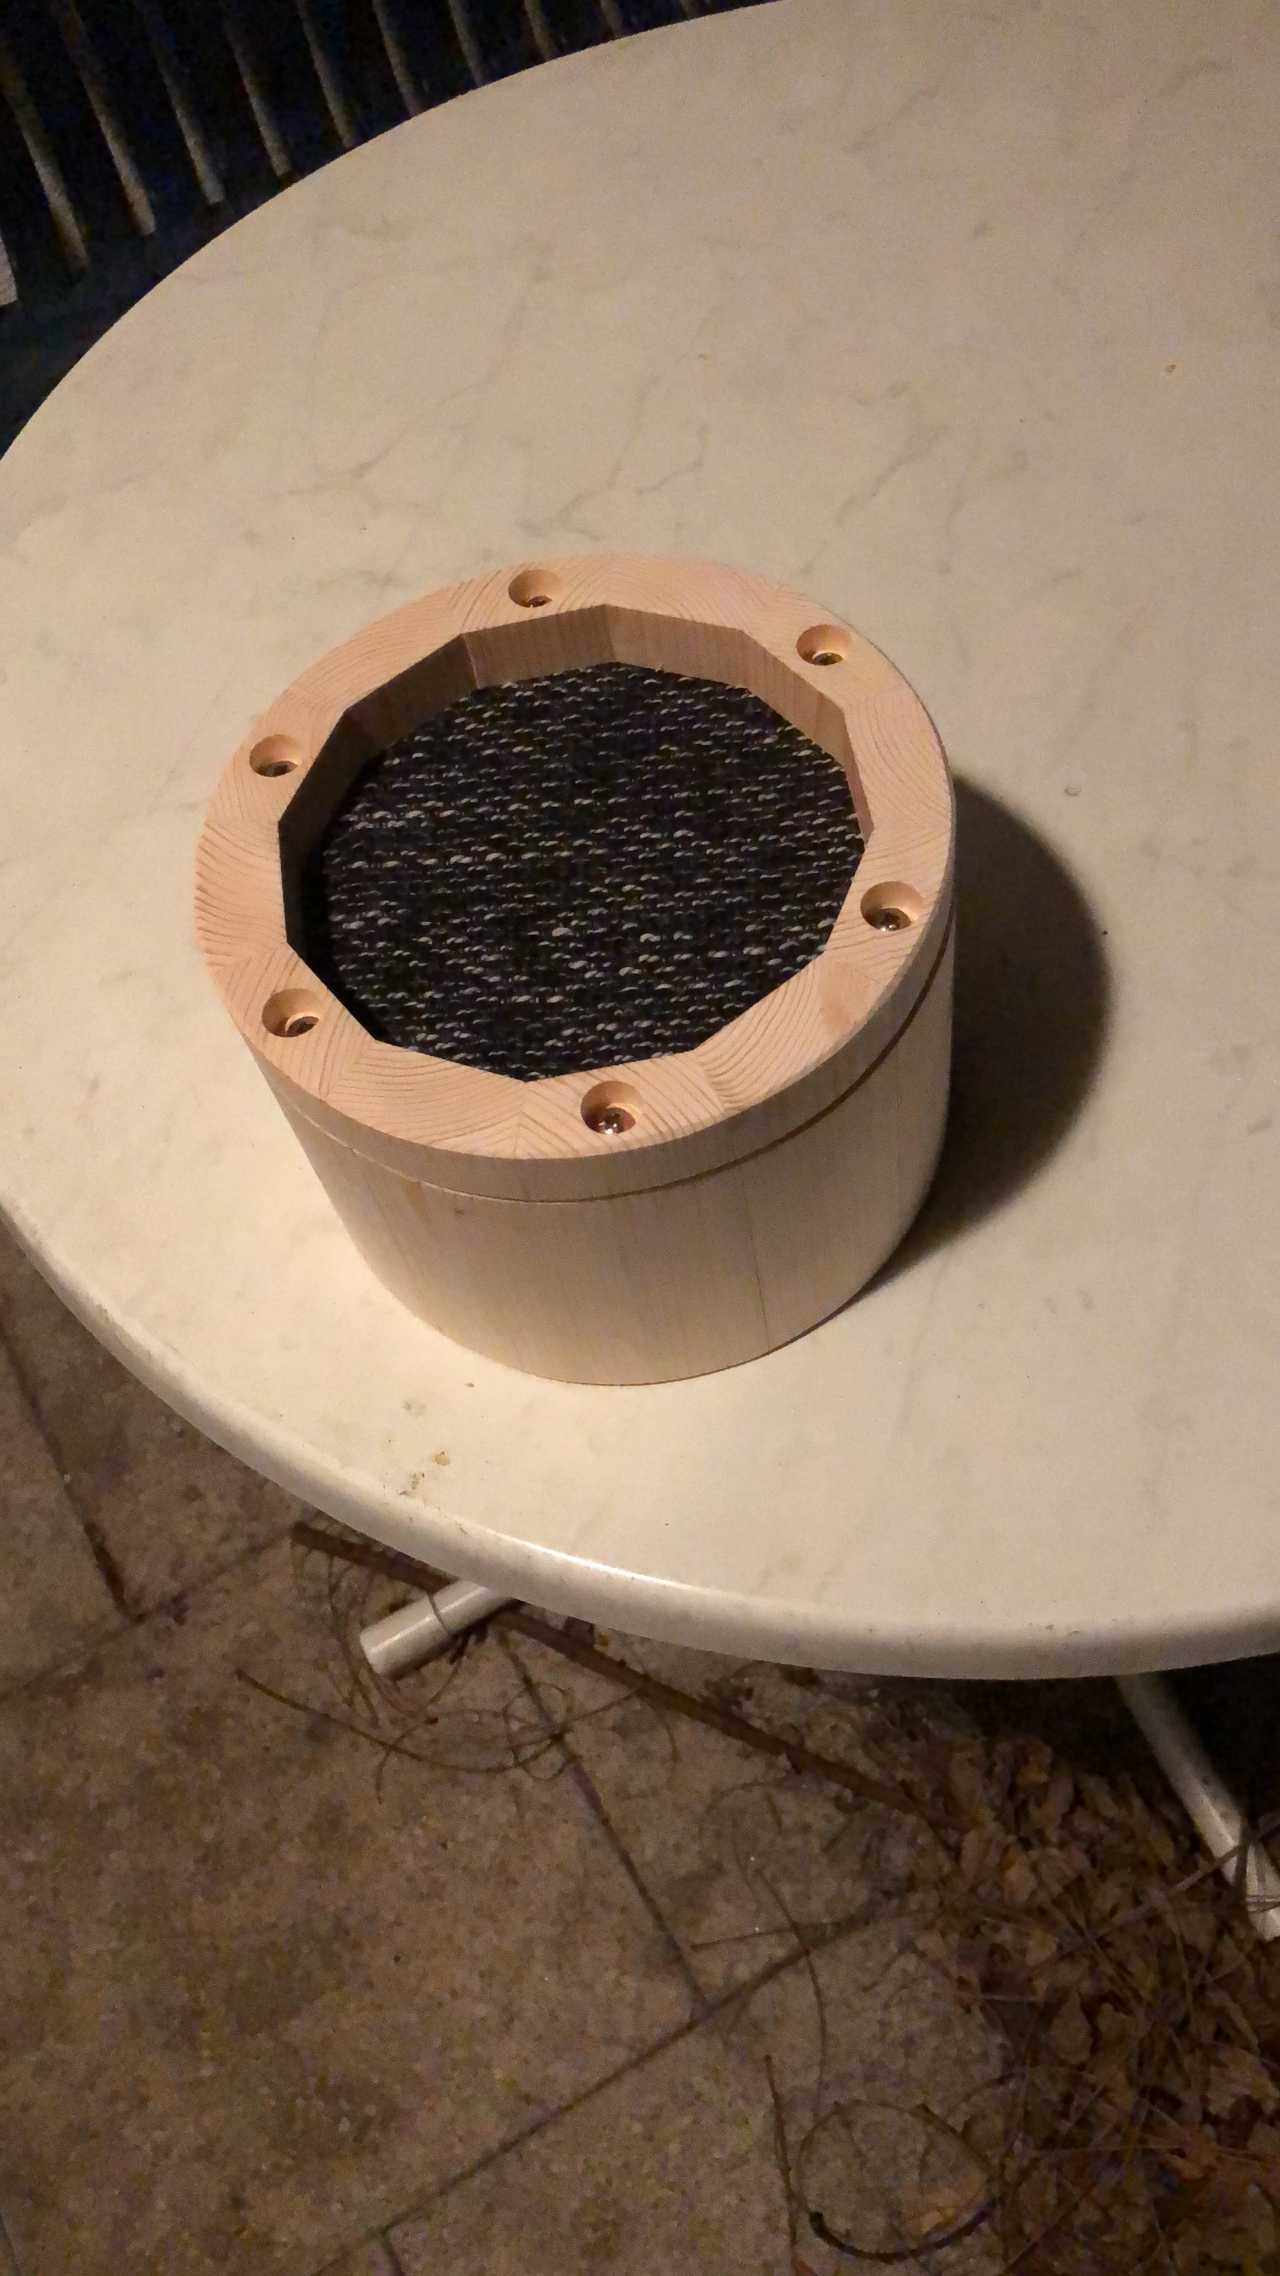
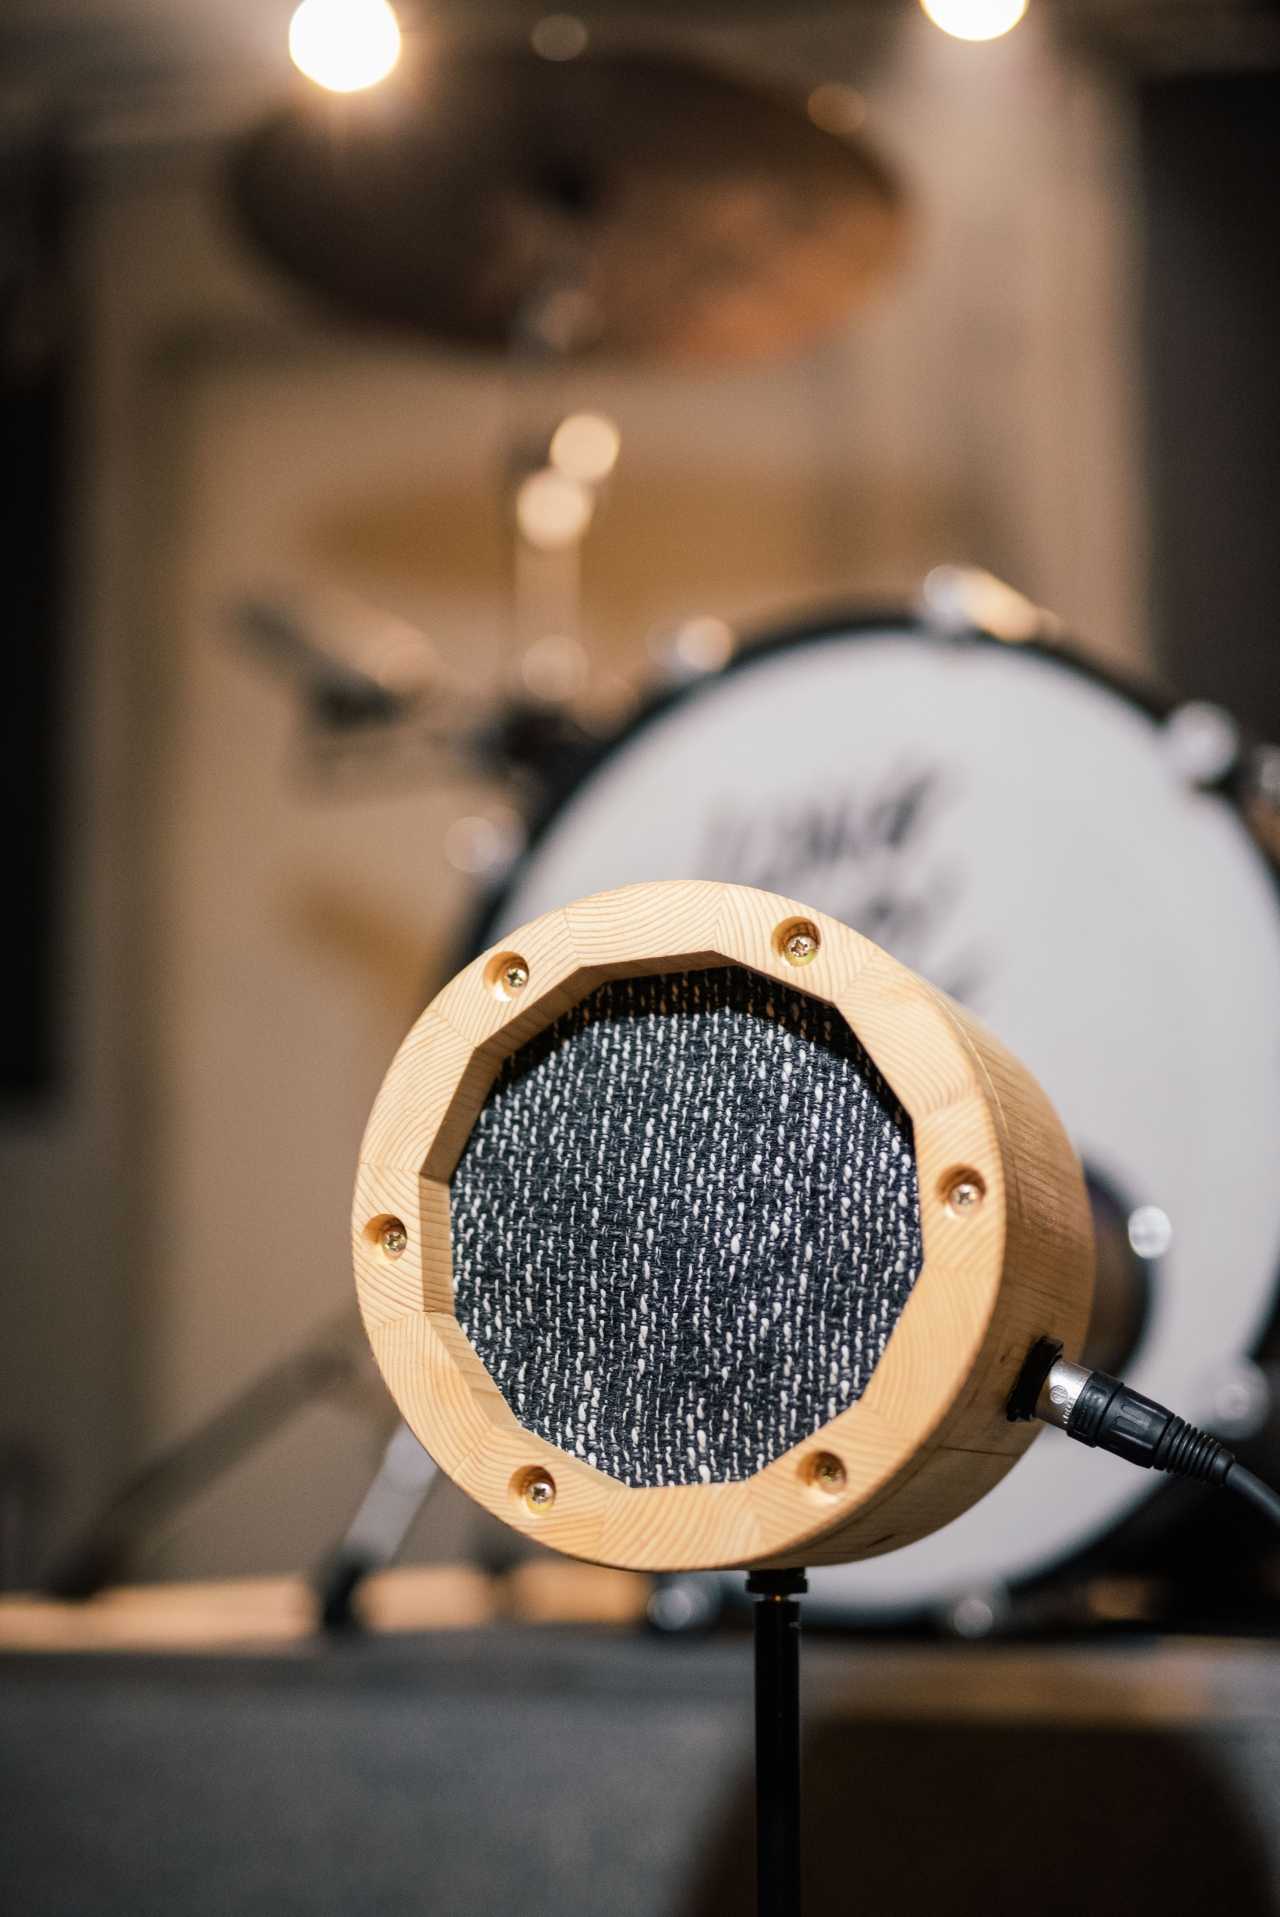
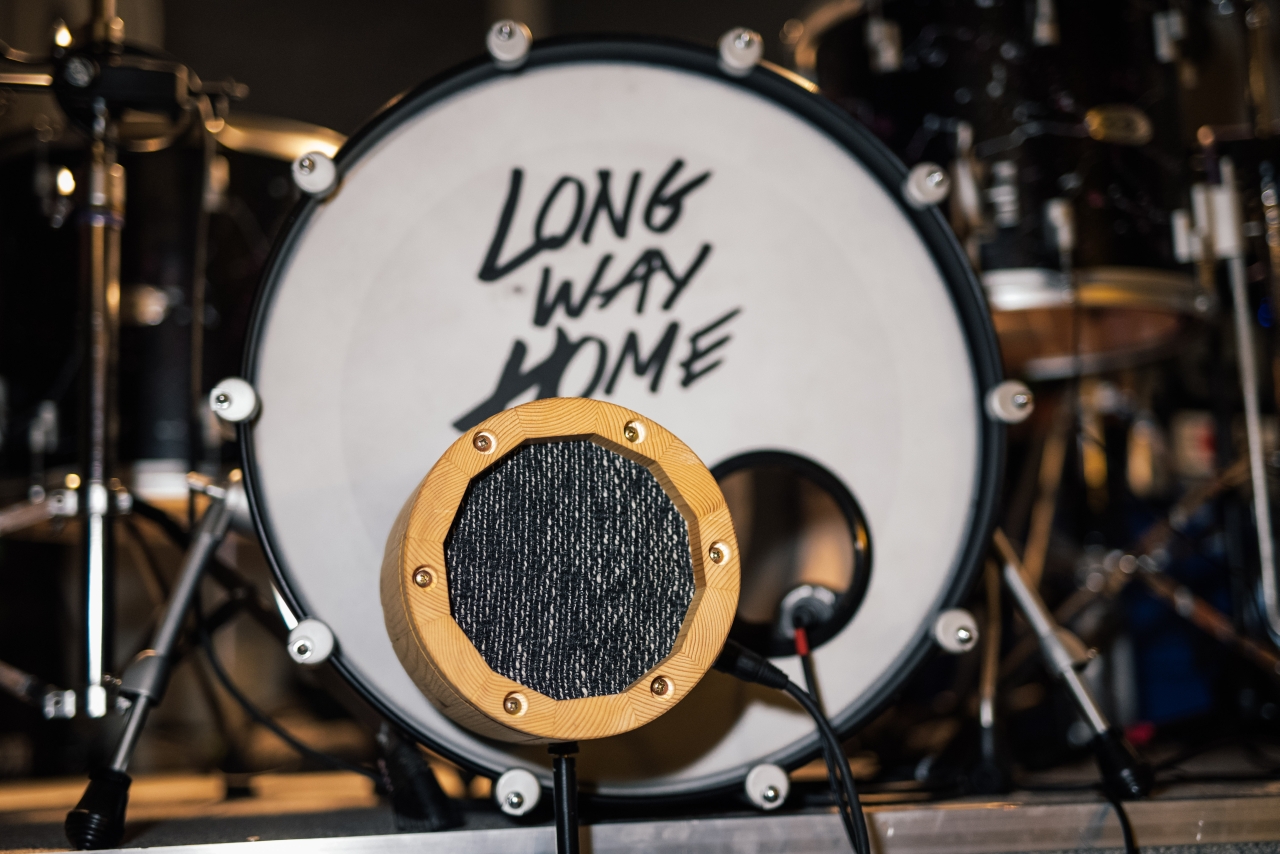
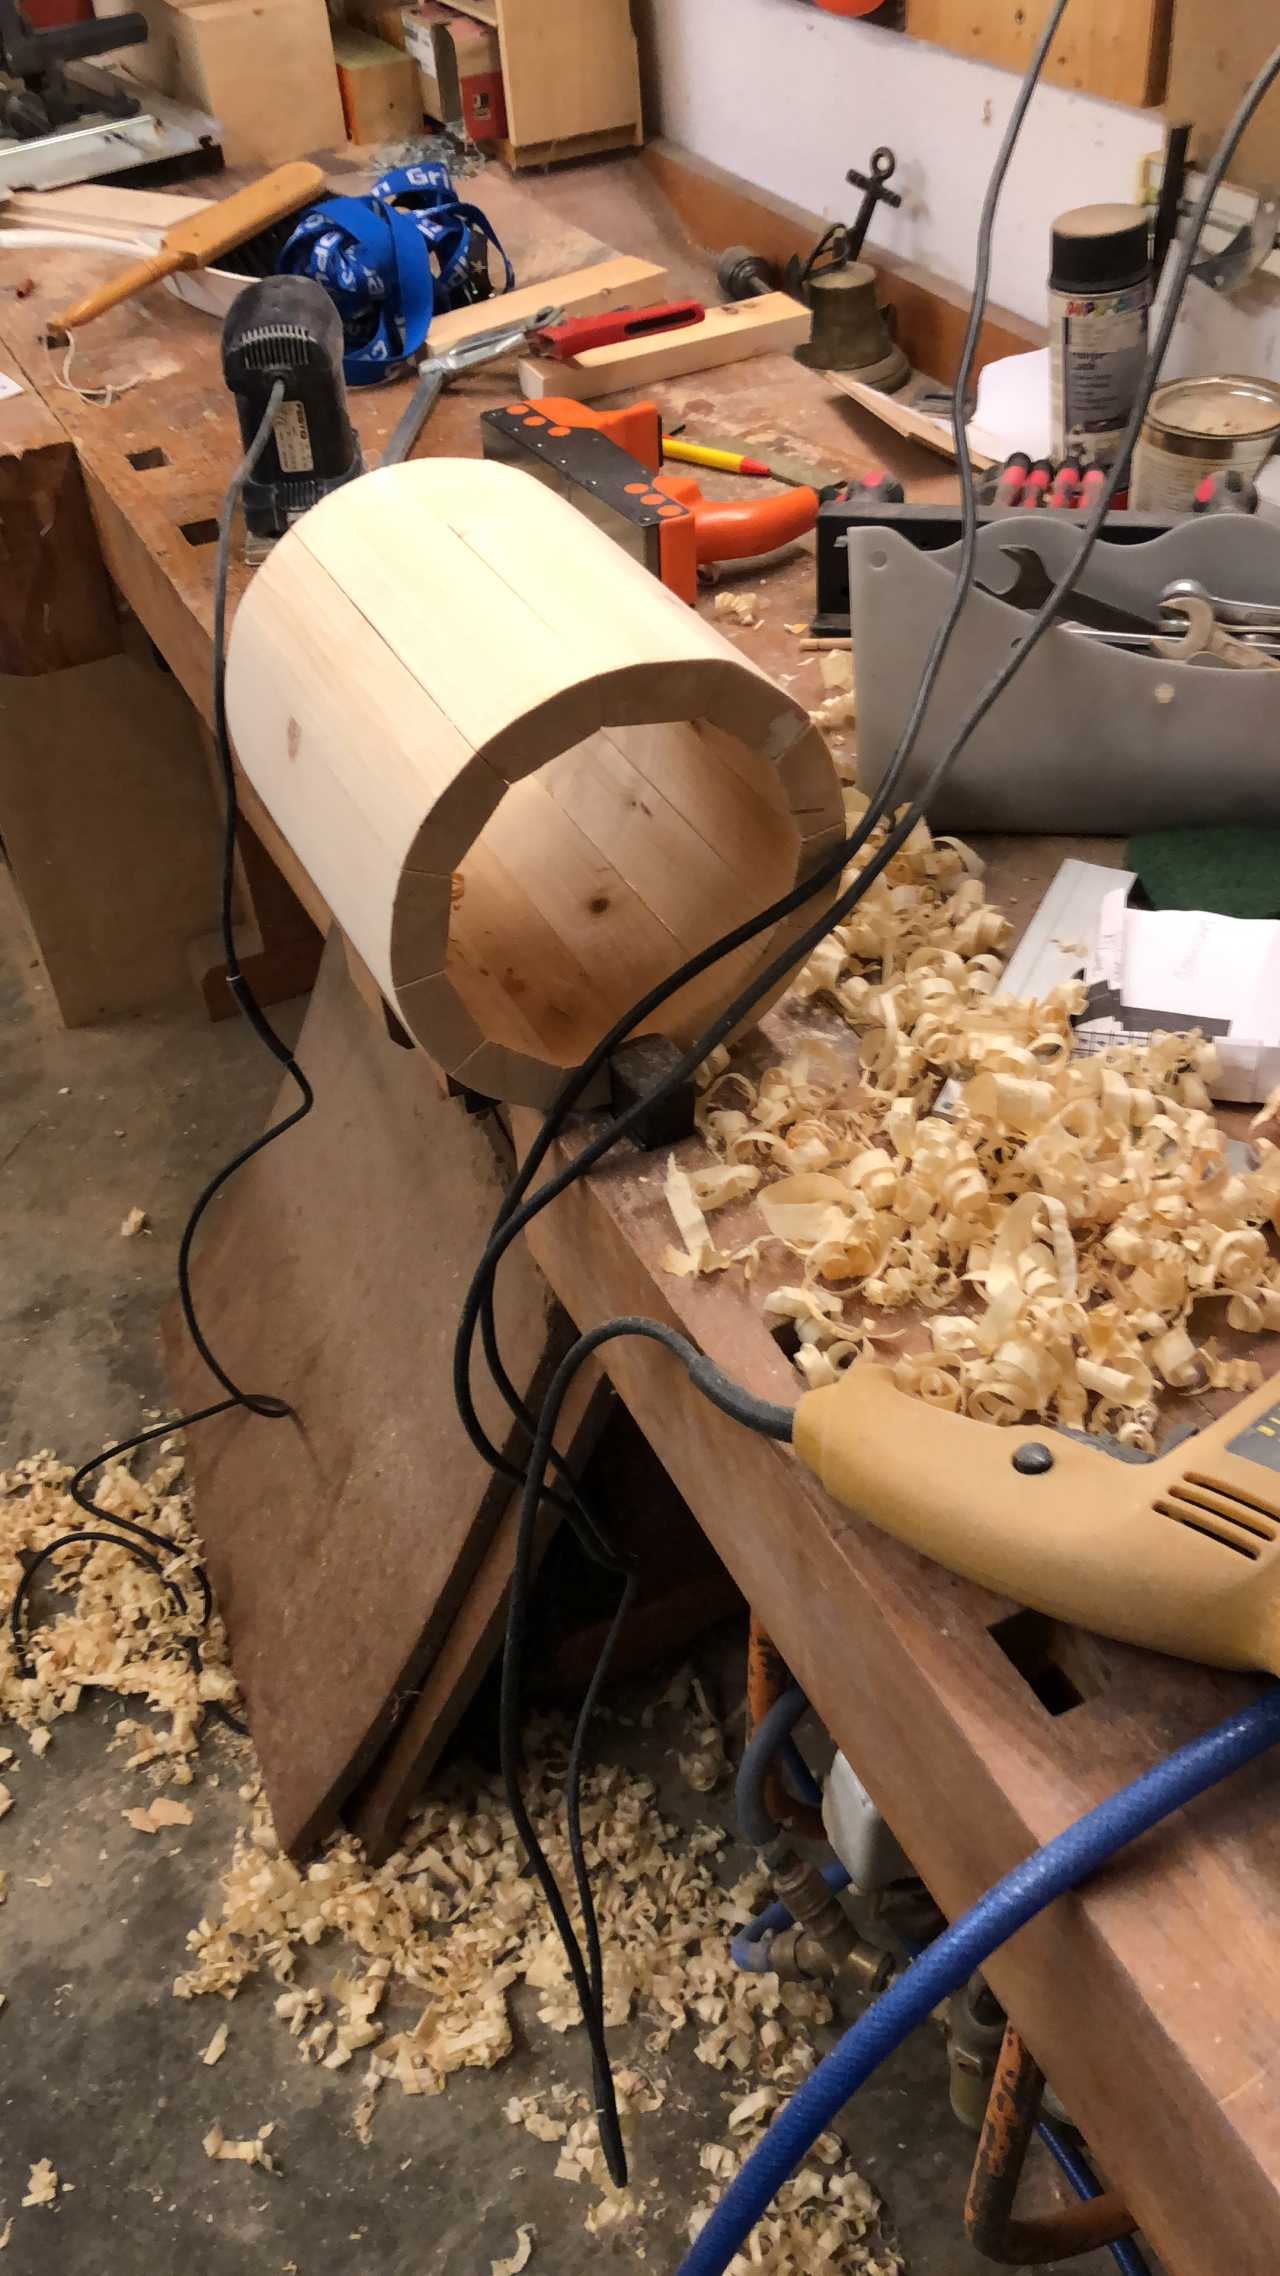
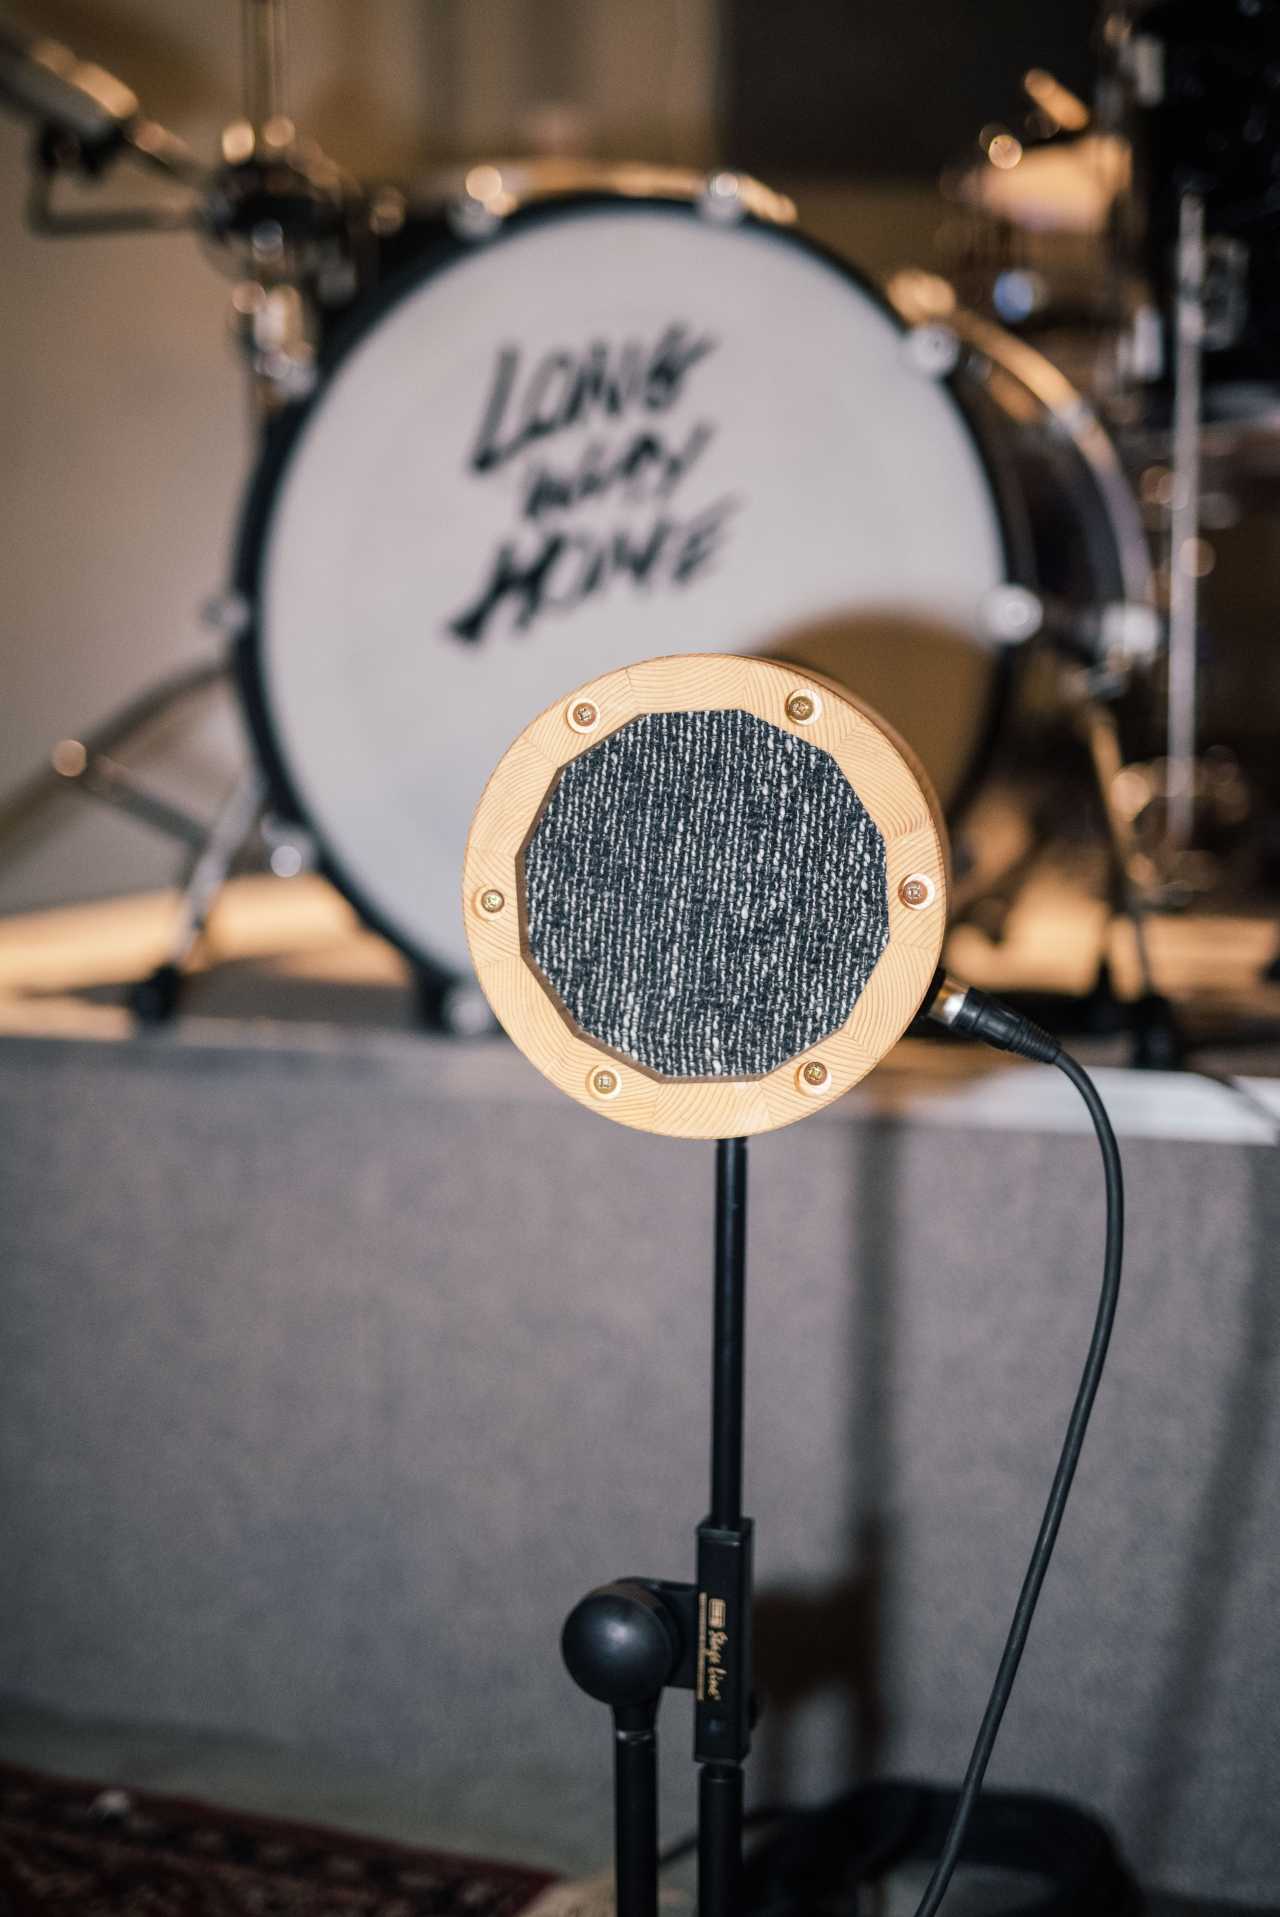
Yes, exactly. Many people just use an old drum for that. But I am a carpenter and happen to be good with wood, so that helped. I used old roof battens. I sawed them to size, glued them together, planed and sanded them. Then I put the speaker in and soldered on the socket for the cables. Now you can use the subkick like a normal microphone.
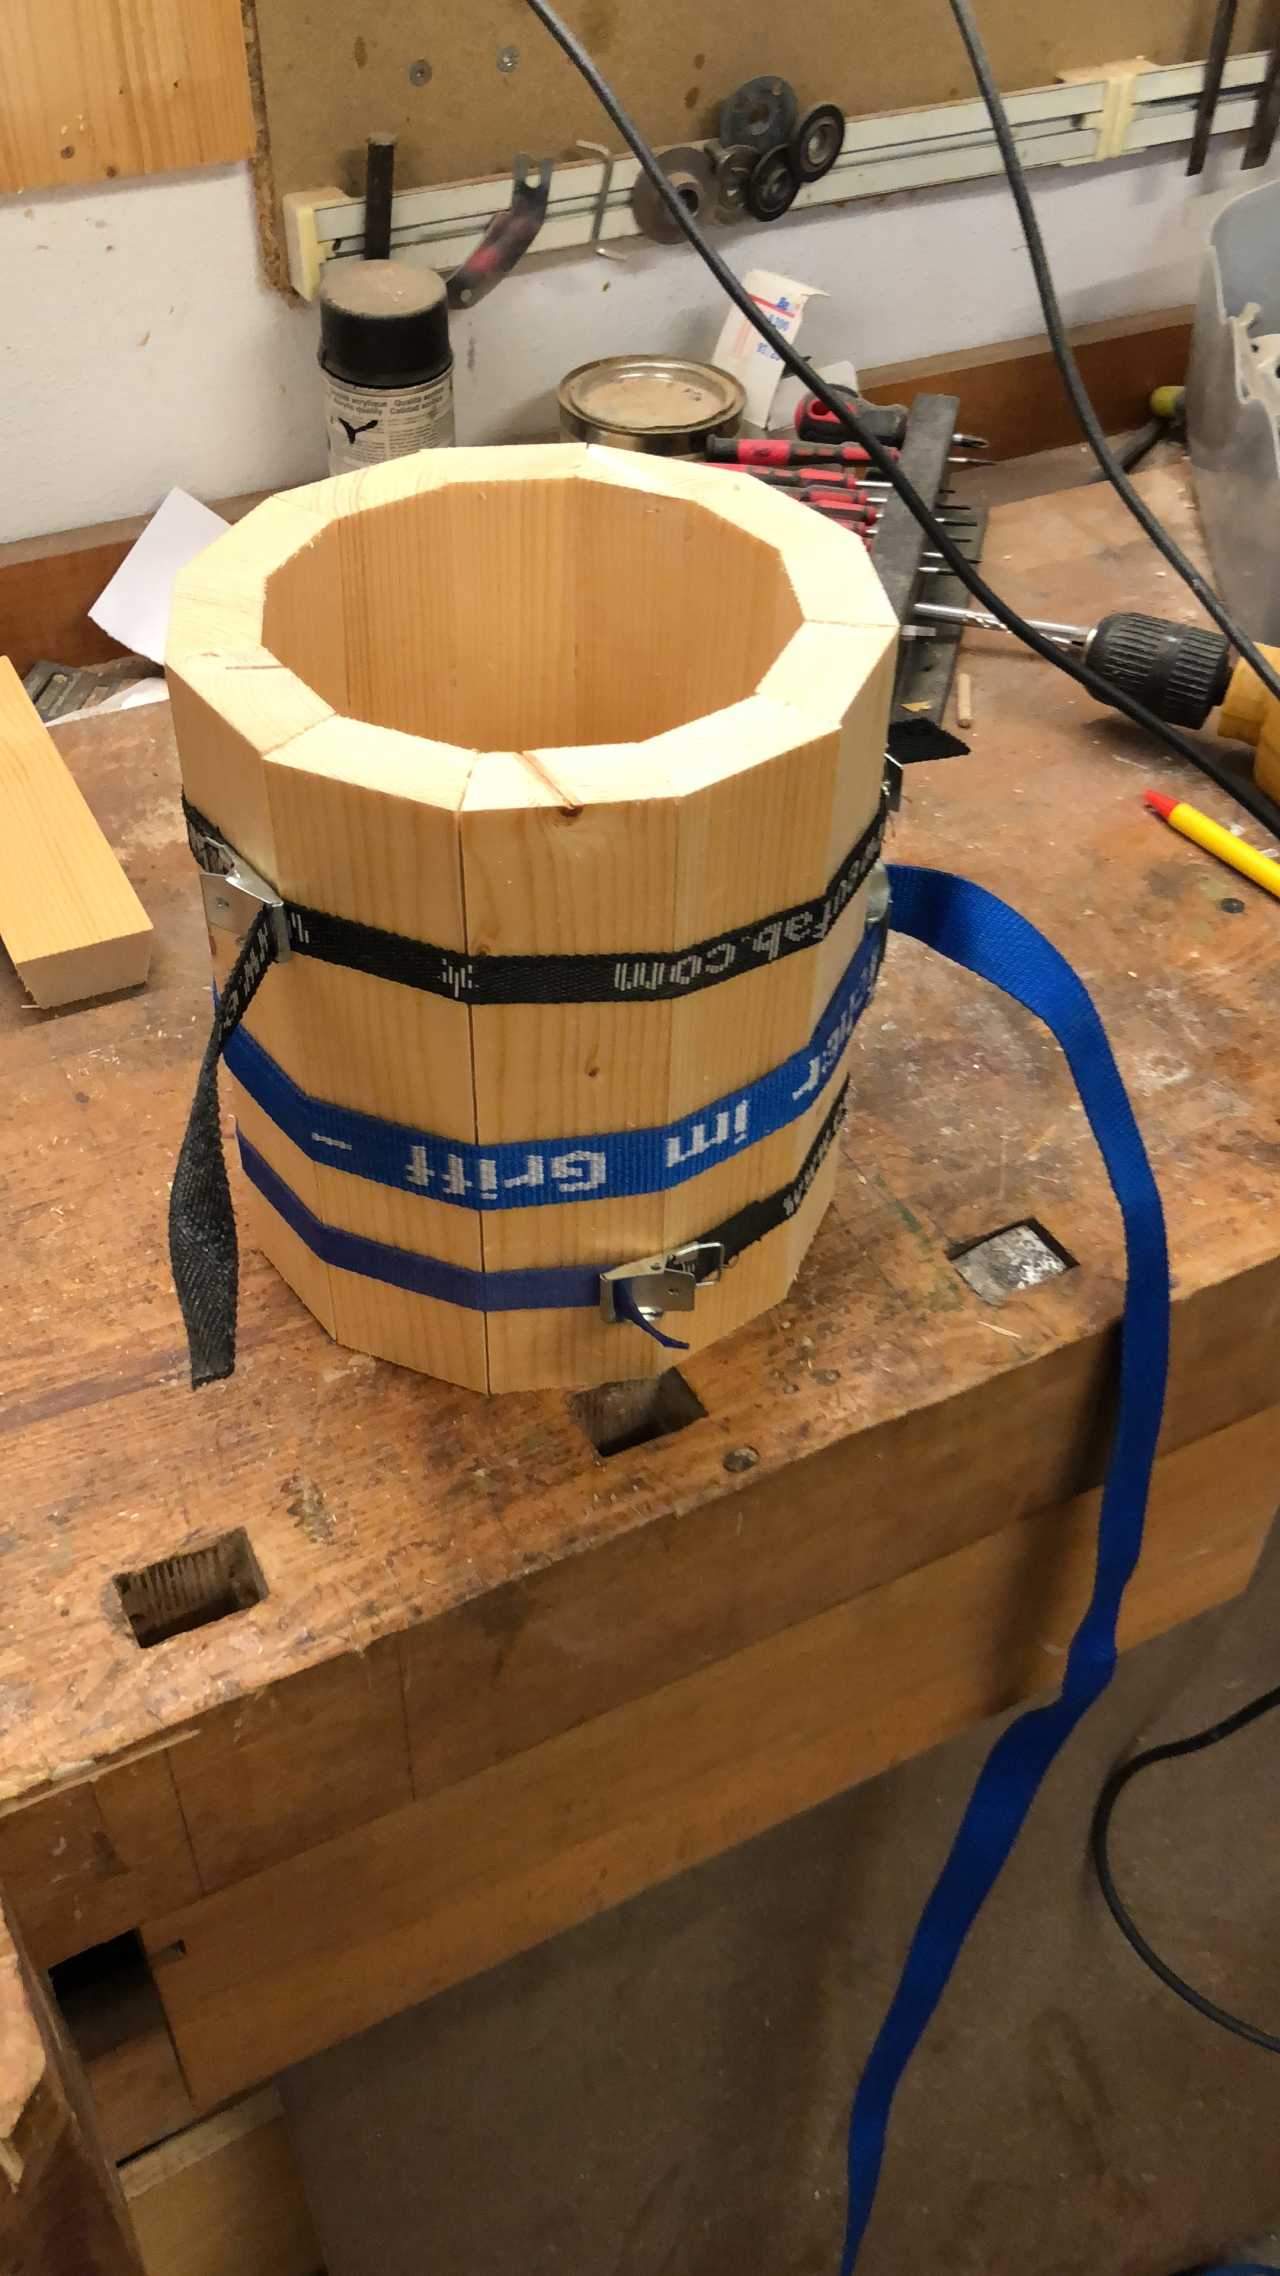
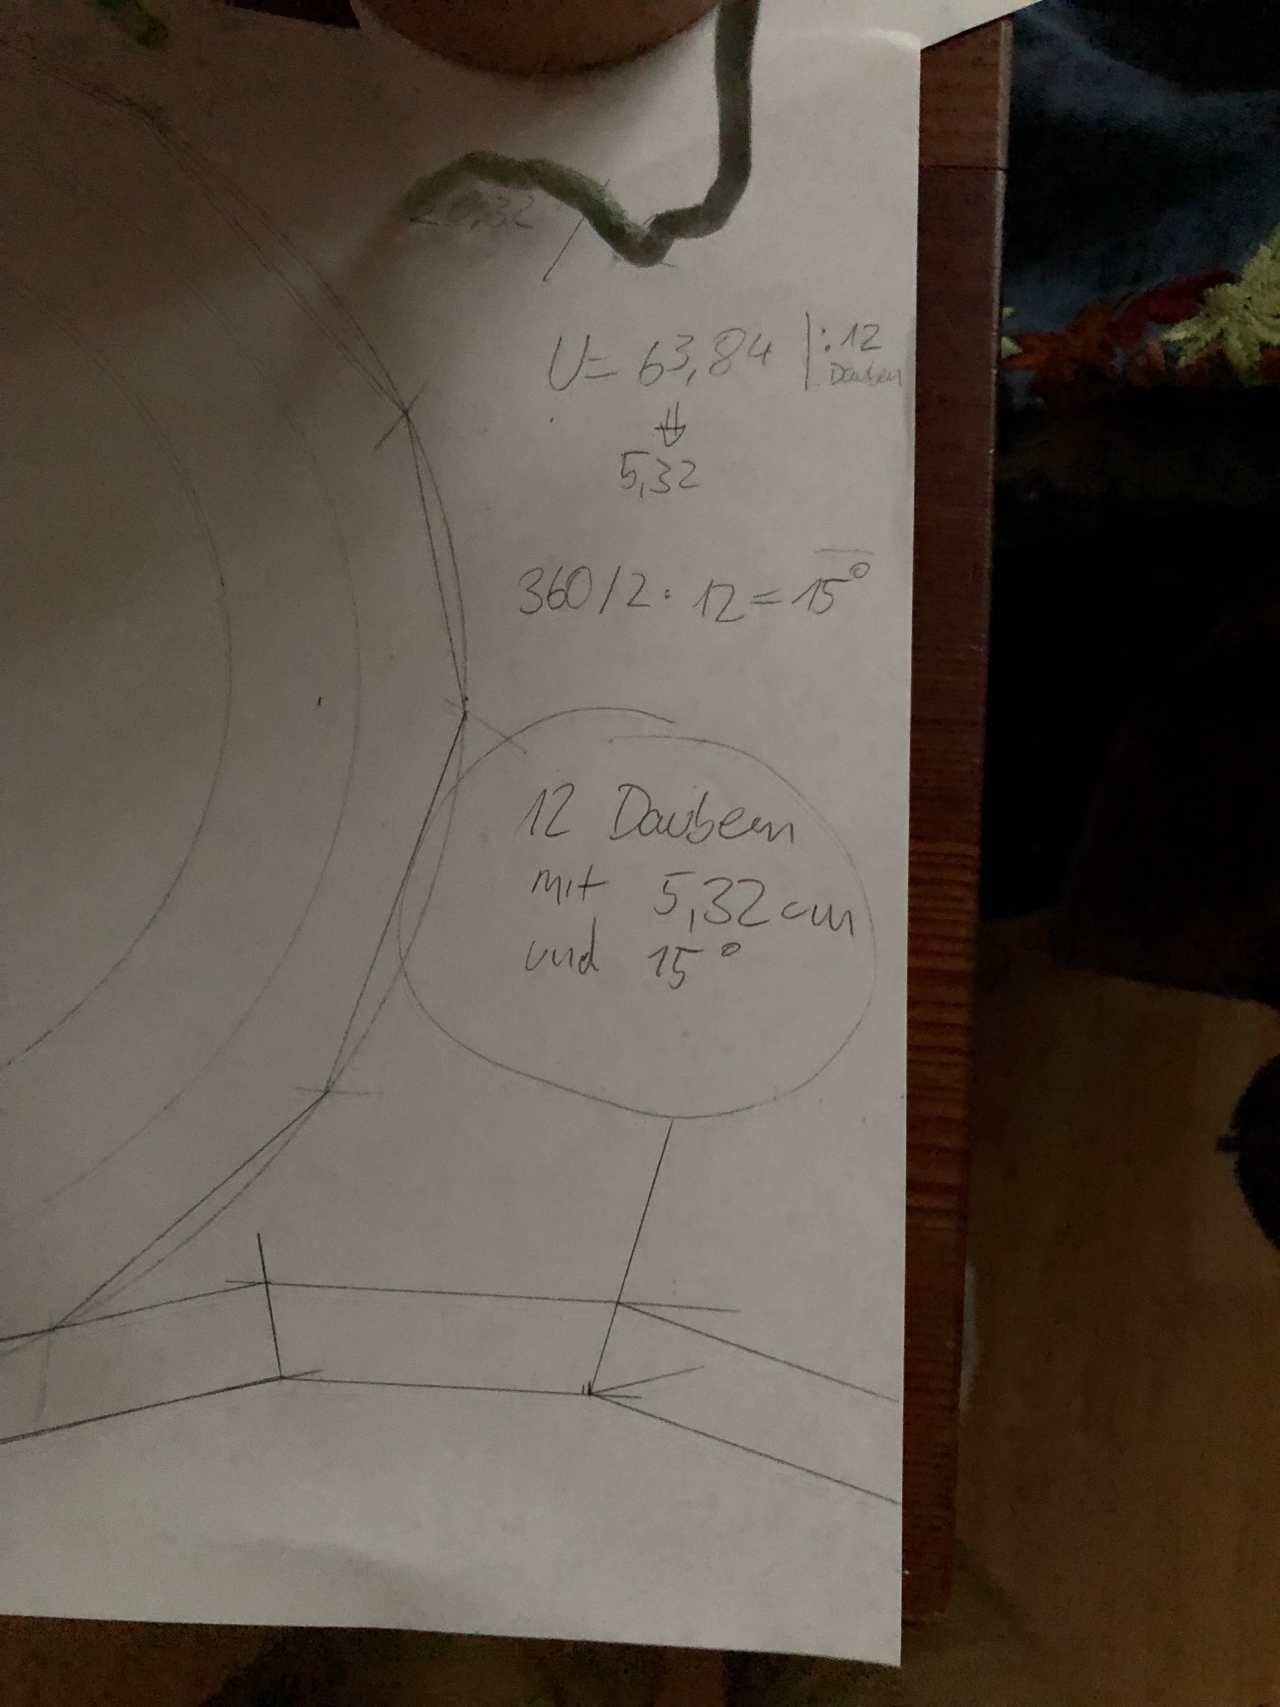
I decided to give the subkick a round shape, like a barrel. I prefer that visually. I used spruce boards. The boards are 22 mm thick. I cut them at 5.32 cm each at a 15° angle to each other into a trapezoid shape. You will get 12 trapezoids of the same length, which you glue together. The best way to do this is to use several short tension belts. When the glue has set, you continue with a hand plane, with which you flatten the corners. You do this until sandpaper is the only thing that helps. Now it is sanding, sanding, sanding. I left the staves a bit longer so that I could cut off a panel from the finished body, which I will then screw to the front.


If you are not all thumbs and have a bit of time to spare, you can get a great studio microphone for less than 70 euros.
Honestly, it is not exactly essential. But it is great to have the possibility to build something like that. It is much cheaper and our low bass in the recordings is much stronger, the effect is impressive.
After several tests, also with an equalizer, I have to say that it was worth the effort.
You prevent the classic overload with good gain staging, as usual. We also had that problem in the beginning. In forums, you sometimes hear this is a problem with subkicks, but basically it is the same as with all other microphones: first you turn the gain all the way down, then slowly feel your way in. The positioning of the microphone goes the same as always: approach the sweet spot carefully, experiment a lot. You could solder a resistor into the front of the subkick, but that took too much effort for me. For us, the sound is all right. We like to use it in the studio, whenever we need a really deep, fat bass. To use it live on stage would be nonsense, there would be too much background noise.
However, you cannot use a subkick as the only microphone to record a kick drum. However, it is not common to use only a subkick anyway. On the other hand, anything you like is allowed in recording.
Fancy more DIY topics? Read in our magazine how to get started with drum recording or how to record your first songs without much effort.
Image source, header graphic and gallery: © LongWayHome