
11 August, 2020

Mastering remains a great mystery for many DIY musicians and home recording beginners. Of course, almost everyone can record a song these days – the technology is affordable and the first notes are quickly recorded. Mixing music is an art – but with patience, passion and freeware, the first steps are quickly taken. And mastering? Almost every musician knows the word and knows that it is important. When it comes to explanations, it becomes more difficult. The fact that there is a mastering engineer job title alone shows that there is more to it than simply remixing. Here we explain what exactly.
Put simply, mastering is the final processing of a recorded track. The final step of post-production. The mixing beforehand focuses on individual elements within the audio tracks, "gluing" the individual tracks together. During mixing, the song grows together. The mastering polishes the overall work of art again. Audio mastering is almost always done by another mixer than the one who completed the remainder of the mixing. Mastering has two objectives:
The track should once again fully exploit its own ambitions. Not in the measured volume, but also in the "felt" volume: the track virtually builds up muscle during the mastering, becomes more dominant where it should dominate. Especially the latter is difficult to achieve and requires a certain amount of experience and a good ear for frequencies. Many amateur productions from home studios sound good, but somehow not quite finished. The last step is missing, the played track doesn't sound prominent, but rather drowns in space, seems out of place.
The track should have the same quality on different speaker systems. At best, each instrument in the mix will sound just as powerful on the car stereo as it does on headphones or on the hi-fi system in the living room.
The most important distinction between mixing and mastering is that the latter adds the final touch to the "finished" product. There's a great analogy: mastering is like Photoshop for audio. You can buy a great camera, take photography courses, shoot the perfect picture, but sometimes the final touch is still missing. There was a mark on the lens, the lighting wasn't perfect. An experienced media designer can make the final adjustments in Photoshop so that the photo develops its full potential. That is mastering.
After you've mixed a song, at some point you become blind to certain nuances. Especially if you recorded the song yourself. Furthermore, your ears get tired even if you've listened at low volume during mixing (and you should – preferably between 75 and 85 dBspl (decibel sound pressure level)). Mastering is also part of the mixing, but should be performed by, or at least with a second pair of ears. That doesn't mean it always has to be done by a professional. You could team up with a band that you're friends with and master each other's tracks. If you really want to do it yourself, allow at least 48 hours between mixing and mastering.
Never underestimate the creative input of a second (or rested) pair of ears – not even in the final stages of the mix.
There are a few points you can observe to make mastering easier or to make it easier for the mastering engineer. To be more precise: there are some things that you should simply not do before the song goes to mastering.
Be sure to record in the highest resolution and also mix in the highest resolution – no sample rate conversion. Therefore: record with 24 bit/48 kHz and master (have mastered) in the same resolution.
Avoid clipping at all costs. Even the mastering won't bring back any transients that clipping has cut off. Resist the temptation to just raise the volume of the song during mixing. That will happen in mastering if the tracks still have enough headroom.
Avoid multiband compressors in the mixing if you don't know exactly what you're doing. Indiscriminate mixing with multiband compressors can throw the track out of balance. Leave it to the mastering professional and work with other instruments.
When mixing, don't process and edit the bus too strongly with compressors, limiters or equalisers. That's what the mastering professional does. Whatever you mess up here in the mix, the mastering can't fix.
The first listening run (with some time distance) is the most important. Sit down, relax and take a notepad. Listen carefully to the finished mixed track for the first time. Ask yourself these questions:
Do the high sections sound too sharp or too muffled?
Are the low sections too dominant; does the track hum?
Is the voice prominent or is it drowned out by the other instruments?
Does the track sound muddy or rather too clean – or does it (not) rumble (enough)?
Which instruments do you hear the least or not at all?
Do you find the sound aggressive, organic, light-footed enough?
Then listen to the track on as many different sound sources as possible: on your smartphone, in the car, on PC speakers, via a PA system. You may even ask yourselves on what medium your song is listened to most. A survey by AudienceNet has shown that seventy percent of those interviewed listen to music in the car – that makes the car the number one source of music – not the high-end speakers in some living room or club.
If cost or time is an issue for you, there are also automated mastering services such as LANDR or Aria. But that should only be the last resort. These services will never be as good as a pair of trained human ears – especially since there is no human contact with whom musicians can consult. However, they are (very) fast and relatively cheap. On the other hand: if you learn the background of mastering, you also learn something about sound technology.
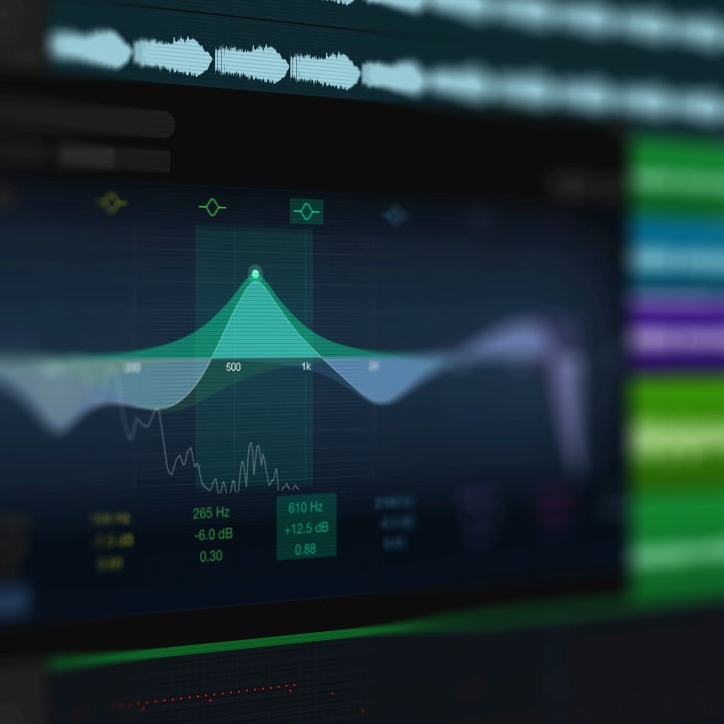
Most musicians knowingly or unknowingly use reference tracks when mixing and mastering. Of course, nobody wants to copy a style. But no one remains unaffected, either. We always have role models and musical roots in other bands and artists. Do it consciously and look at both your track and the most important reference track in the graphic analyser. This way, you can use your eyes as well as your ears to find problematic areas. Look for valleys and peaks that you find suspicious and listen to them one at a time. Note: each song has an individual frequency spectrum. A direct alignment of songs is not appropriate. It's just food for thought.
More compression? Didn't we do that (enough) in the mix? Yes, but compressing individual instruments is different from compressing a bus track. So "mixing bus compression" is the compression after the mixdown, which is intended to thicken the whole track again. How does it work? Here's a possible approach, where you slowly, step by step, bring attack and release together until the event sounds optimal. The order is important here:
Start with a ratio of 3:1. This is a good starting point that you can adjust later.
Lower the threshold until you achieve approximately 8-10 dB gain reduction. Don't be surprised if you change it again later.
The release should be very fast as a starting point; possibly 5 ms. Rule of thumb: too short a release time leads to audible pumping; if the release time is too long, the compressor rarely or never returns to the zero state. This results in a near-constant gain reduction, which you don't want.
Set a rather slow (i.e. high) attack time of 100 ms. Decrease this value until the transients dull the track, then turn it back a bit.
Now increase the release until you have the feeling that the song and the compressor are working at the same frequency. The aim is to balance the effect of the compressor with the musicality of the track. You'll reach the "sweet spot" when the release time complements the attack time.
Now you can relax the threshold again until you feel it fits the song.
You can now try lowering the ratio from 3:1 to 2:1 or increasing it to 4:1. Try out what works better with the song.
After compression, don't forget to give back some power to the whole track with the make-up gain.
Also pay attention to which compressor you use. Not all are suitable for mastering. Mastering compressors are often explicitly called "bus compressor" or something similar.
But the rule of thumb remains: less is more!
Imagine you only want to edit a very specific area of a sound group. With a multiband compressor, you can compress only a specific frequency range instead of the entire track. A multiband compressor works like a normal compressor with threshold, ratio and so on. You only set the frequency range on which it should act. So you can easily set a gain reduction of 4 dB to the range between 150 and 200 Hz. An audio scalpel!
For mastering, it is best to use a linear phase equaliser ("phase-linear equaliser") because we want to make very narrow, subtle increases or decreases. An example would be that we want to remove the resonant frequency of a snare. With other equalisers, we would have the problem that the phase shift would also noticeably affect the frequencies around the problem frequency. A linear phase equaliser removes the undesired resonance without changing the overall sound of the snare. Basic rule: decreasing (subtractive equalisation) is more pleasant for the ear than increasing. If you want to emphasise a specific frequency range, it's often more effective to decrease frequencies around, below, or above that band instead. Don't worry, you can get the volume back with the limiter.
For practical purposes, think about what impression you had in step 1
This is how you work on different problem areas with the equaliser:
The mix sounds too sharp, obtrusive, scratchy? An equaliser reduction of 3-8 kHz helps. Or a slight increase in the low frequencies. This results in the high frequencies being somewhat deadened; a psychoacoustic effect.
The mix hums too much? Decrease at 100-150 Hz.
The mix sounds muddy? This is often due to an excess of low midranges. Try to attenuate by 150-350 Hz. This creates space for the high midranges.
The track sounds thin? Raises the range around 500 Hz "carefully" or reduces adjacent frequencies.
The limiter should be the last plugin the chain. It provides for extra muscle power on the finished track. Your track level should be adjusted by 0 dB. So let's take a look at the output level first. We should limit this to -0.5 dB. So we also avoid clipping there where a sound system still adds gain itself.
Basically, you then proceed in a similar way to the compressor in step 3: start with cautious initial values for attack (100 ms), release (500 ms) and input gain (8-10 dB gain reduction). Then you slowly work your way forward until you reach your optimum, your personal sweet spot.
The short version: you have four options for powerful, deep basses in mastering.
Use a resonance filter with a high-pass filter around 20 Hz
Use harmonic distortions
Use a sub-frequency generator (often just "sub generator")
Compress and amplify the overtones directly via your low frequencies
Bass in mastering: by equaliser
The relevant low frequencies for mastering are between 25 and 70 Hz. So here it is important to provide support. What many beginners do not suspect: there are equalisers that have been specially developed to boost sub-bass frequencies. An example is the Brainworx bx_subfilter. The plugin uses a resonance filter to boost the relevant frequencies. If you don't have or don't want to use a corresponding plugin, use a normal equaliser in linear phase mode. Boosts the range from 25-70 Hz. In addition, you can attenuate the range up to 20 Hz with a high-pass filter. This reduces phase cancellation. Finally, you can convert the signal into midranges and sides. When you do this, listen to the low range of the sides. Checks whether part of the signal is lost. If so, snip the side form down to 70 Hz, so you have the low frequencies in mono. Otherwise, there will be phase cancellations, which can severely weaken the effect of the low frequencies. Here too, it is best to use the linear phase for particularly targeted equalisation.
Bass in mastering: through saturation
When you're saturating low frequencies, it's ideal if you can isolate saturation to just the appropriate low frequency range. For this purpose, tools such as FabFilter Saturn 2 can help. Use this to create a dedicated band just for the lower frequencies. Gradually, you can make harmonic adjustments and create overtones that make the basic tone more audible. Let us assume that our frequency is 30 Hz and we saturate the signal. If we get a second and third order harmonic (what does this mean?), this means that we will also boost 60Hz and 90Hz. These overtones, related to the fundamental frequency, create a psychoacoustic effect where the fundamental frequency is generated in our heads. This in turn makes it easier to hear, or at least it is perceived as more dominant. Experiment a little to see which saturation works best.
Bass in mastering: using a generator for the low(est) frequencies
It can happen that the low frequencies are completely missing from the mix. In this case, it doesn't matter how much you boost between 30 and 70 Hz because there is nothing to boost. The solution: a sub-frequency generator. Whereas typical distortion and saturation plugins boost the overtones above the fundamental frequency, a sub-frequency generator creates a frequency below the fundamental frequency. It does this by measuring the signal, finds the fundamental wave, and then creates a tone pitch-shifted version further down the spectrum. You will notice: this newly generated frequency is half the frequency of the original fundamental frequency. There are also plugins for this.
Bass in mastering: compressing and boosting low-frequency overtones
There are plugins that specifically compress and boost overtones in the low frequencies. Instead of generating the low frequencies themselves, these plugins generate overtones to the appropriate frequencies. This is similar to a "saturator" but more consistent and targeted. One example is MaxxBass. The result is that the listener better perceives the fundamental low frequencies. You can also mix the amplitude of these generated overtones with the original signal and listen to both individually. This gives a clear impression of how these affect the signal. Such plugins not only make the low frequencies more audible, but also help you with speakers that do not have good low-frequency reproduction. Because the effect of the plugin is psychoacoustic: your head generates the basic tone when the right overtones are present, even if the basic tone isn't actually there.
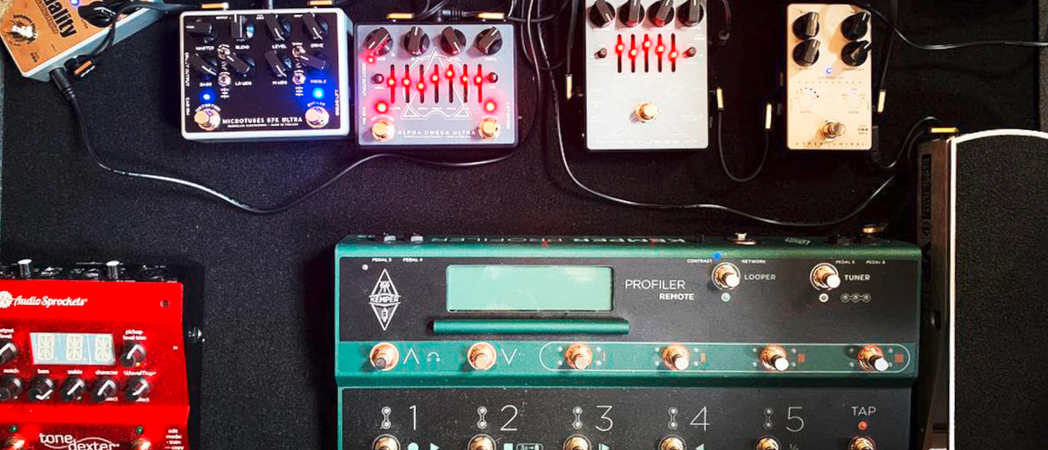
Bildquelle Headergrafik: © peach_fotolia - AdobeStock
With these tips, you should be able to make your first experiences in mastering. Always remember: it is not for nothing that in mastering, a different technician usually performs the actual mixing. Real magic lies above all in the distance from your own mix.